SaltyCrane Blog — Notes on JavaScript and web development

PyQt 4.2 QAbstractTableModel/QTableView Example

from PyQt4.QtCore import *
from PyQt4.QtGui import *
import sys

my_array = [['00','01','02'],
            ['10','11','12'],
            ['20','21','22']]

def main():
    app = QApplication(sys.argv)
    w = MyWindow()
    w.show()
    sys.exit(app.exec_())

class MyWindow(QWidget):
    def __init__(self, *args):
        QWidget.__init__(self, *args)

        tablemodel = MyTableModel(my_array, self)
        tableview = QTableView()
        tableview.setModel(tablemodel)

        layout = QVBoxLayout(self)
        layout.addWidget(tableview)
        self.setLayout(layout)

class MyTableModel(QAbstractTableModel):
    def __init__(self, datain, parent=None, *args):
        QAbstractTableModel.__init__(self, parent, *args)
        self.arraydata = datain

    def rowCount(self, parent):
        return len(self.arraydata)

    def columnCount(self, parent):
        return len(self.arraydata[0])

    def data(self, index, role):
        if not index.isValid():
            return QVariant()
        elif role != Qt.DisplayRole:
            return QVariant()
        return QVariant(self.arraydata[index.row()][index.column()])

if __name__ == "__main__":
    main()

How to remove trailing whitespace in Eclipse

Actually, Eclipse has functionality to remove trailing whitespace, but
for some reason they don't expose it by default.

If you go to the key bindings, select modify and select File for the
category you will see that there is a Remove trailing whitespace that
can be bound to a key.

I don't see any way to actually add that to the menus.

To do it automatically check out the AnyEdit plugin:
http://andrei.gmxhome.de/anyedit/
I installed the AnyEdit plugin and it works great.

Data hiding in C, an object-oriented technique

I am working on some legacy code which uses almost entirely global variables. My task is to change the scope of the variables that don't need to be global. I have changed many of the variables to function scope because they are not used elsewhere, however there is a lot of data that is shared among functions.

My first idea was to create data structures of the shared data and pass pointers to those structures through the parameter list of the functions. However I had some multi-layer function calls. I.e., function1 calls function2 which calls function3. Only the last function called needed the shared data, but the parameter needed to be passed among many functions.

After looking over some other code, I got the idea for using "get" and "set" functions as used in object-oriented programming to access the data structures. The data structures are defined as static at the file scope. The file is like an object with functions that operate on the static data. External (outside the file) access to the data is only allowed through external interface functions declared in a header file which get and set the data. Here is a simple example with an accessor "get" function which passes a pointer to the static structure. It is declared as a pointer to a pointer because I need to pass the pointer by reference so it can be modified. However the structure itself is declared const so that the accessor won't change the data by mistake. To summarize, it is a pointer to a const structure passed by reference.

main.c:
#include 
#include "algorithm.h"
        
int main(void)
{
   const ALGORITHM_DATA *alg_ptr;
      
   Algorithm();
   GetAlgorithmData(&alg;_ptr);
   /*alg_ptr->data1 = 99.9;*/ /* This is illegal */
   printf("%f\n", alg_ptr->data1);
   printf("%f\n", alg_ptr->data2);
   printf("%f\n", alg_ptr->data3);
   
   return 0;
}
algorithm.c:
#include "algorithm.h"

static ALGORITHM_DATA alg;

void GetAlgorithmData(const ALGORITHM_DATA **out)
{
   *out = &alg;
}
 
void Algorithm(void)
{
   alg.data1 = 1.0;
   alg.data2 = 2.0;
   alg.data2 = 3.0;
}
algorithm.h:
#ifndef ALGORITHM_H_
#define ALGORITHM_H_

typedef struct {
   double data1;
   double data2;
   double data3;
} ALGORITHM_DATA;

void GetAlgorithmData(const ALGORITHM_DATA **out);
void Algorithm(void);

#endif /*ALGORITHM_H_*/

How to show diffs with Subclipse

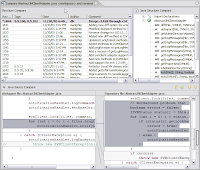
I want to show revision history diffs in SVN/Subclipse/Eclipse. I looked in the "History" view, but this is not where to find it. Instead, right-click on your file in the "Navigator" view, select "Compare With" > "Revision...". Then double-click on a revision to compare to. The example screenshot is from Mark's blog.

How to setup a subclipse project to branch/tag

I've read that branching/tagging is one of the nice features of SVN (See Mark Phippard's blog and the subversion book). However, it took me a little while to figure out how to set up my directory structure with the recommended "trunk", "branches", and "tags" folders. These are my basic step-by-step notes for how I set up my Subclipse project and then created a branch. This assumes you've already installed Subclipse and set up a repository. If you have not done that, see How to install Subversion (SVN) with Eclipse on Windows.

  1. Add your Eclipse project to the repository in a "trunk" folder
    • Start with an Eclipse project named "myproject"
    • In the "Navigator" window, right-click on your project, select "Team" > "Share Project..."
    • Select "SVN" and click "Next"
    • Select your repository. (This tutorial assumes it is located at "svn://localhost".) Click "Next".
    • In the "Enter Folder Name" dialog, select the "Use specified folder name" option and enter "myproject/trunk". The "URL:" box should show something like "svn://localhost/myproject/trunk". Click "Next".
    • Click "Finish". A new dialog will open. Select the files to commit, enter a comment, and click "OK". I got the following output in the "Console" window:
          Filesystem has no item
      svn: URL 'svn://localhost/myproject/trunk' non-existent in that revision
      
          Bad URL passed to RA layer
      svn: URL 'svn://localhost/myproject' non-existent in revision '234'
      
      mkdir -m "Initial import." svn://localhost/myproject
      mkdir -m "Initial import." svn://localhost/myproject/trunk
      checkout -N -r HEAD svn://localhost/myproject/trunk
          Checked out revision 236.
      add -N C:\path\to\myproject\.settings
          A         C:/path/to/myproject/.settings
      add -N C:\path\to\myproject\.settings\org.eclipse.cdt.core.prefs
          A         C:/path/to/myproject/.settings/org.eclipse.cdt.core.prefs
      add -N C:\path\to\myproject\.cdtbuild
          A         C:/path/to/myproject/.cdtbuild
      add -N C:\path\to\myproject\.settings\org.eclipse.cdt.managedbuilder.core.prefs
          A
      C:/path/to/myproject/.settings/org.eclipse.cdt.managedbuilder.core.prefs
      add -N C:\path\to\myproject\.cdtproject
          A         C:/path/to/myproject/.cdtproject
      add -N C:\path\to\myproject\.project
          A         C:/path/to/myproject/.project
      commit -m "Initial import." C:/path/to/myproject/.cdtbuild C:/path/to/myproject/.cdtproject C:/path/to/myproject/.project C:/path/to/myproject/.settings C:/path/to/myproject/.settings/org.eclipse.cdt.core.prefs C:/path/to/myproject/.settings/org.eclipse.cdt.managedbuilder.core.prefs
          Adding         path/to/myproject/.cdtbuild
          Adding         path/to/myproject/.cdtproject
          Adding         path/to/myproject/.project
          Adding         path/to/myproject/.settings
          Adding         path/to/myproject/.settings/org.eclipse.cdt.core.prefs
          Adding         path/to/myproject/.settings/org.eclipse.cdt.managedbuilder.core.prefs
          Transmitting file data ...
          Committed revision 237.

  2. Create "branches" and "tags" folders in the repository
    • Switch to the "SVN Repository Exploring" perspective. (From the "Window" menu, select "Open Perspective" > "Other...". Select "SVN Repository Exploring" and click "OK".)
    • In the "SVN Repository" window, expand the tree, and right-click on "myproject", select "New" > "New remote folder".
    • In the "Create a new remote folder" dialog, expand the tree and select "myproject". For "Folder name:", enter "branches". Click "Next".
    • Enter a comment and click "Finish".
    • Expanding the "myproject" folder now shows the "branches" and "trunk" subfolders.
    • I got the following output in the "Console" window:
      mkdir -m "Created branches folder." svn://localhost/myproject/branches
    • Repeat these steps to create a "tags" folder.

  3. Create a branch
    • Switch back to the previous perspective.
    • Commit any changes you want in the branch.
    • In the "Navigator" window, right-click your project and select "Team" > "Update"
    • Right-click your project and select "Team" > "Branch/Tag..."
    • In the "Copy (Branch/Tag)" dialog, in the "To URL:" textbox, enter "svn://localhost/myproject/branches/mybranch". (The "From WC at URL:" box should read "svn://localhost/myproject/trunk".)
    • Leave the "HEAD revision in the repository" option selected, enter a comment, and click "OK".
    • I got the following output in the "Console" window:
      copy -rHEAD svn://localhost/myproject/trunk svn://localhost/myproject/branches/mybranch
  4. Switch your working copy to the branch
    • You can now switch your working copy between the trunk and the branch.
    • Right-click your project and select "Team" > "Switch to another Branch/Tag..."
    • In the "To URL:" textbox, enter "svn://localhost/myproject/branches/mybranch". Click "OK".
    • I got the following output in the "Console" window:
      switch svn://localhost/myproject/branches/mybranch C:/path/to/myproject -rHEAD
              At revision 239.
  5. You should now be able use the features discussed in Enhanced Support for Branches and Tags in Subclipse

Branching steps were taken from How to branch with Subclipse.

How to unload a vxworks module

If you download a vxworks .out file but then decide you want to get rid of it, you can use the "unld" command. See the example below:
-> unld "myapp.out" 
value = 0 = 0x0
See also section 5.2.7 of the Tornado User's Guide.
 

How to change directories in the Tornado Shell

You need to put quote marks around the directory you want to change to. See the following session in windsh:
-> cd "c:/tornado2.2" 
value = 0 = 0x0
-> pwd
c:/tornado2.2
value = 0 = 0x0
-> ls
Volume in drive C has no label.
Volume Serial Number is XXXX-XXXX

Directory of c:\tornado2.2

[.] [..] [.wind]
[docs] [host] LICENSE.TXT
lmPhoneNL.txt [Patch] README.TXT
[SETUP] setup.log setup.log.abort
[share] [target] WIND_VIEW_README.TXT
6 File(s) 69,108 bytes
9 Dir(s) 933,806,080 bytes free
value = 0 = 0x0
->

How to run the VxWorks Simulator from the command line

Here's how to run VxSim, a target server, and the Tornado shell from the command line in Windows. I am using Tornado 2.2.1 and Windows XP.
  1. Open a "cmd.exe" window.
  2. Enter the following commands as shown in my session:
    C:\>cd c:\Tornado2.2\target\config\simpc
    
    C:\Tornado2.2\target\config\simpc>vxworks
    
    C:\Tornado2.2\target\config\simpc>cd c:\tornado2.2\host\x86-win32\bin
    
    C:\Tornado2.2\host\x86-win32\bin>tgtsvr -V -B wdbpipe -R c:/temp -RW -c c:\Torna
    do2.2\target\config\simpc\vxWorks.exe vxsim
  3. The target server icon should now show in your system tray. If you double-click on it, you should see:
    tgtsvr (vxsim@MYCOMPUTER): Fri Mar 16 10:32:51 2007
        Checking License ...OK
        Connecting to target agent... succeeded.
        Attaching C++ interface... succeeded.
        Attaching pecoff OMF reader for SIMNT CPU family... succeeded.
    • Note: Your Tornado registry must already be running. If you setup your Tornado registry to run as a Windows service it will show up as wtxregds.exe in the Processes tab of the Windows Task Manager. If it is not running, you will get something like this:
      tgtsvr (vxsim@MYCOMPUTER): Fri Mar 16 16:27:21 2007
          Checking License ...OK
      Cannot contact Wind Registry on host: localhost
      Target Server will exit
      To start the Tornado registry, run wtxregd.exe (not wtxregds.exe) from the command prompt:
      C:\Tornado2.2\host\x86-win32\bin>wtxregd
  4. Now start the shell:
    C:\Tornado2.2\host\x86-win32\bin>windsh vxsim
    
          /////   /////   /////   /////   /////       |
         /////   /////   /////   /////   /////        |
        /////   /////   /////   /////   /////         |
        /////   /////   /////   /////   /////         |
       //////  //////  //////  //////  //////         |
       //////  //////  //////  //////  //////         |     T  O  R  N  A  D  O
        /////   /////   /////   /////   /////         |
        /////   /////   /////   /////   /////         |
         /////   /////   /////   /////   /////        |     Development  System
          ////    ////    ////    ////    ////        |
           ////    ////    ////    ////    ////       |
            ////    ////    ////    ////    ////      |     Host  Based   Shell
             ////    ////    ////    ////    ////     |
              ////    ////    ////    ////    ////    |
               ///     ///     ///     ///     ///    |     Version  2.2
               ///     ///     ///     ///     ///    |
                //      //      //      //      //    |
                //      //      //      //      //    |
                //      //      //      //      //    |
               //      //      //      //      //     |
    
          Copyright 1995-2003 Wind River Systems, Inc.
    
    C++ Constructors/Destructors Strategy is AUTOMATIC
    
    -> i
      NAME        ENTRY       TID    PRI   STATUS      PC       SP     ERRNO  DELAY
    ---------- ------------ -------- --- ---------- -------- -------- ------- -----
    tExcTask   _excTask       ed8de0   0 PEND         40984c   ed8ce4       0     0
    tLogTask   _logTask       ed32b0   0 PEND         40984c   ed31b4       0     0
    tWdbTask   _wdbTask       ece668   3 READY        40984c   ece51c       0     0
    value = 0 = 0x0
    ->
  5. Easy. Actually it took me a little while to figure out I needed to specify the VxWorks core file with the -c option for the tgtsvr command. If you don't do this, you will get the following error message:
    tgtsvr (vxsim@MYCOMPUTER): Fri Mar 16 10:31:37 2007
        Checking License ...OK
        Connecting to target agent... succeeded.
        Attaching C++ interface... succeeded.
        Attaching pecoff OMF reader for SIMNT CPU family... succeeded.
        Error: Couldn't open C:\Tornado2.2\vxworks: status = 0x2
    Error during target server core initialization
    Target Server will exit
    And if you forget to specify the target name, you will get:
    A target must be specified.
    Target Server will exit
Related posts:
Tornado Tools Command Line Summary
How to use Tornado GNU tools with Eclipse/CDT
Tornado 2.2 file locations