SaltyCrane Blog — Notes on JavaScript and web development

Emacs mode line color custimization

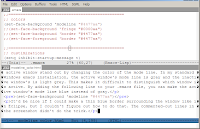
If you have more than one window in your emacs session, it's nice to make the active window stand out by changing the color of the mode line. In my standard Windows emacs installation, the active window's mode line is gray and the inactive window's is light grey. This makes it difficult to distinguish which window is active. By adding the following line to your .emacs file, you can make the active window's mode line blue instead of gray.

(set-face-background 'modeline "#4477aa")

It'd be nice if I could make a thin blue border surrounding the window like in Eclipse, but I couldn't figure out how to do that. The commented-out lines in the screenshot didn't do the trick.

Using Python's finditer to highlight search items

I am trying to search through various text and highlight certain search terms within that text using HTML markup. As an example, if I take a paragraph of text from Paul Prescod's essay, I would like to highlight the search terms "lisp", "python", "perl", "java", and "C" each in different colors. My first attempt at this problem looked somthing like:

for sentence in re.split(r"[?.]\s+", text):
    match = re.search(r"\blisp\b", sentence, re.I)
    if match:
        color = 'red'
    else:
        match = re.search(r"\bpython\b", sentence, re.I)
        if match:
            color = 'blue'
        else:
            match = re.search(r"\bperl\b", sentence, re.I)
            if match:
                color = 'orange'

I didn't finish it because, not only is it ugly and verbose, it doesn't do what I want. Instead of matching all the search terms, it only matches the first one in each sentence. Fortunately, I took some time to rethink the problem (i.e. search the internet (this thread on the Python mailing list was helpful (I guess my Perl background is still showing) as was this article which I previously referenced. (hmmm, this is starting to look like Lisp.))) and made a prettier (and correct) version using my new favorite regular expression method, finditer, and the MatchObject's lastindex attribute. Here is the working example:

import re

COLOR = ['red', 'blue', 'orange', 'violet', 'green']

text = """Graham says that Perl is cooler than Java and Python than Perl. In some circles, maybe. Graham uses the example of Slashdot, written in Perl. But what about Advogato, written in C? What about all of the cool P2P stuff being written in all three of the languages? Considering that Perl is older than Java, and was at one time the Next Big Language, I think you would have a hard time getting statistical evidence that programmers consider Perl "cooler" than Java, except perhaps by virtue of the fact that Java has spent a few years as the "industry standard" (and is thus uncool for the same reason that the Spice Girls are uncool) and Perl is still "underground" (and thus cool, for the same reason that ambient is cool). Python is even more "underground" than Perl (and thus cooler?). Maybe all Graham has demonstrated is that proximity to Lisp drives a language underground. Except that he's got the proximity to Lisp argument backwards too."""

regex = re.compile(r"(\blisp\b)|(\bpython\b)|(\bperl\b)|(\bjava\b)|(\bc\b)", re.I)

i = 0; output = "<html>"
for m in regex.finditer(text):
    output += "".join([text[i:m.start()],
                       "<strong><span style='color:%s'>" % COLOR[m.lastindex-1],
                       text[m.start():m.end()],
                       "</span></strong>"])
    i = m.end()
print "".join([output, text[m.end():], "</html>"])
This example loops over each match in the iterator object returned by finditer. For each match, non-matching text and matching text surrounded with the HTML <span> tag are appended to the output string. start() and end() return the indices to the start and end positions of the matching text. The color of the text is determined by using lastindex to index into a list of colors. lastindex is the index of the group of the last match. So, it is "1" if "lisp" is matched, "2" if "python" is matched, "3" if "perl" is matched, and so on. I need to subtract 1 because the list indexing starts at 0. The last line adds on the rest of the non-matching text, and prints it. When viewed in a browser, it looks something like this:
Graham says that Perl is cooler than Java and Python than Perl. In some circles, maybe. Graham uses the example of Slashdot, written in Perl. But what about Advogato, written in C? What about all of the cool P2P stuff being written in all three of the languages? Considering that Perl is older than Java, and was at one time the Next Big Language, I think you would have a hard time getting statistical evidence that programmers consider Perl "cooler" than Java, except perhaps by virtue of the fact that Java has spent a few years as the "industry standard" (and is thus uncool for the same reason that the Spice Girls are uncool) and Perl is still "underground" (and thus cool, for the same reason that ambient is cool). Python is even more "underground" than Perl (and thus cooler?). Maybe all Graham has demonstrated is that proximity to Lisp drives a language underground. Except that he's got the proximity to Lisp argument backwards too.
Using Python's finditer for Lexical Analysis

Fredrik Lundh wrote a good article called Using Regular Expressions for Lexical Analysis which explains how to use Python regular expressions to read an input string and group characters into lexical units, or tokens. The author's first group of examples read in a simple expression, "b = 2 + a*10", and output strings classified as one of three token types: symbols (e.g. a and b), integer literals (e.g. 2 and 10), and operators (e.g. =, +, and *). His first three examples use the findall method and his fourth example uses the undocumented scanner method from the re module. Here is the example code from the fourth example. Note that the "1" in the first column of the results corresponds to the integer literals token group, "2" corresponds to the symbols group, and "3" to the operators group.

import re

expr = "b = 2 + a*10"
pos = 0
pattern = re.compile("\s*(?:(\d+)|(\w+)|(.))")
scan = pattern.scanner(expr)
while 1:
    m = scan.match()
    if not m:
        break
    print m.lastindex, repr(m.group(m.lastindex))
Here are the results:
2 'b'
3 '='
1 '2'
3 '+'
2 'a'
3 '*'
1 '10'

Since this article was dated 2002, and the author was using Python 2.0, I wondered if this was the most current approach. The author notes that recent versions (i.e. version 2.2 or later) of Python allow you to use the finditer method which uses an internal scanner object. Using finditer makes the example code much simpler. Here is Fredrik's example using finditer:

import re

expr = "b = 2 + a*10"
regex = re.compile("\s*(?:(\d+)|(\w+)|(.))")
for m in regex.finditer(expr):
    print m.lastindex, repr(m.group(m.lastindex))

Running it produces the same results as the original.

Installing Ubuntu with Vista on Dell 1405

I just installed Ubuntu linux on my Dell E1405 personal laptop. A friend had talked about setting up an Ubuntu machine so I thought it would be good for talking tech and also good experience. The setup so far has been relatively easy. The most difficulty has been that I had to delete two of Dell's partitions on the hard disk before I could install Ubuntu. I am dual booting Windows Vista, which was already installed, and Ubuntu 7.04 Feisty Fawn. I know Gutsy Gibson is only a few days away but I couldn't wait.

My Dell laptop came with 4 primary partitions already loaded:
  1. the Dell Utility FAT16 partition: 47 MB
  2. the Dell Recovery partition: 10 GB
  3. the main Windows Vista NTFS partition: 62.48 GB
  4. the MediaDirect FAT32 partion: 2 GB
This is the reason I only had about 25 GB free on my 80 GB SCSI hard disk. So it seems that the hard disk is only allowed to have 4 primary partitions. I deleted the Recovery partition. That was an easy decision because I didn't want it in the first place. Then I had to decide between the Utility or the MediaDirect partition. MediaDirect allows you to bypass Windows and directly view multimedia files such as pictures, music or DVDs. The Utility partion is used for diagnosing your computer in case something goes wrong. It appears to run a bunch of hardware tests. Both seemed nice to have but I decided to be practical and save the Utility partition. It will be nice to have something to test my hardware if things go wrong in the future. The rest of the installation was easy. I used the guide from APC. It was the top of my Google search for "dual boot ubuntu vista" and it worked fine. The next step is getting my EVDO broadband card working so I can access the internet.

Python profiling of 2 string concatenation techniques

In Efficient String Concatenation in Python, the author tests the performace of 6 methods for concatenating strings in Python. I wanted to test the methods myself, for the experience, and also because the article was a few years old. It turns out the timing module he used for performance profiling is no longer included in Python 2.5. So I went to the Python documentation and found that there are 3 profilers currently included with Python 2.5: profile, cProfile, and hotshot. (See 25. The Python Profilers in the Library Reference for more info.) I made a quick choice to use cProfile and tried out the fastest and slowest of the 6 methods. Below is the code and the results. It turns out, for me, the second method is not as significantly different as the original test. (Maybe because this was improved between Python 2.2 and 2.5? I'm guessing.) However, it is much more concise, and appears to be the more elegant, declarative approach that I have founnd myself reading about recently.

test.py:
import cProfile

BIG_NUMBER = 1000000

def method1():
    mystring = ''
    for i in xrange(BIG_NUMBER):
        mystring += `i`
    return mystring

def method2():
    return ''.join([`i` for i in xrange(BIG_NUMBER)])

cProfile.run('method1()')
cProfile.run('method2()')

Results:
$ python test.py
         3 function calls in 2.515 CPU seconds
   
   Ordered by: standard name
   
   ncalls  tottime  percall  cumtime  percall filename:lineno(function)
        1    0.000    0.000    2.515    2.515 <string>:1(<module>)
        1    2.515    2.515    2.515    2.515 test.py:5(method1)
        1    0.000    0.000    0.000    0.000 {method 'disable' of '_lsprof.Profiler' objects}
         
         
         4 function calls in 1.734 CPU seconds
   
   Ordered by: standard name
   
   ncalls  tottime  percall  cumtime  percall filename:lineno(function)
        1    0.000    0.000    1.734    1.734 <string>:1(<module>)
        1    1.609    1.609    1.734    1.734 test.py:11(method2)
        1    0.000    0.000    0.000    0.000 {method 'disable' of '_lsprof.Profiler' objects}
        1    0.125    0.125    0.125    0.125 {method 'join' of 'str' objects}

Python finditer regular expression example

I often process text line by line using the splitlines() method with a for loop. This works great most of the time, however, sometimes, the text is not neatly divisible into lines, or, I need to match multiple items per line. This is where the re module's finditer function can help. finditer returns an iterator over all non-overlapping matches for the regular expression pattern in the string. (See docs.) It is a powerful tool for text processing and one that I don't use often enough.

Here is a simple example which demonstrates the use of finditer. It reads in a page of html text, finds all the occurrences of the word "the" and prints "the" and the following word. It also prints the character position of each match using the MatchObject's start() method. (See docs.) Note that, for simplicity, I didn't mess with the HTML tags at all. I just pretended it was plain text. Oh, and the example text is taken from Steve Yegge's article: How To Make a Funny Talk Title Without Using The Word "Weasel"

Python code:

import re
import urllib2

html = urllib2.urlopen('http://steve-yegge.blogspot.com/2007/08/how-to-make-funny-talk-title-without.html').read()
pattern = r'\b(the\s+\w+)\s+'
regex = re.compile(pattern, re.IGNORECASE)
for match in regex.finditer(html):
    print "%s: %s" % (match.start(), match.group(1))

Results:

1301: The Word
12291: The Word
13367: the cut
14025: the car
15050: the free
15513: the third
15558: the sessions
15617: the ONLY
15684: the ground
15911: the OSI
15933: The Attack
16051: The gist
16115: the term
16178: the creator
16741: the thing
16850: the same
16877: the thing
16942: the next
17131: the talk
17374: the room
17727: the hell
17782: the term
17830: the 1980s
18083: the whole
18158: the same
18230: the mountain
18305: the seat
18537: The pro
18718: the banner
18928: the poor
19006: the midst
19223: the buzzwagon
19326: the source
19437: the OSI
19855: the OSI
19927: the other
20055: the Ten
20404: The 22
20517: the OSI
20616: the book
21098: the collective
21553: the proposed
21681: the Five
21932: the nearest
22690: The rest
22858: the entertaining
23255: the crap
23561: the next
23661: the registration
23963: the registration
24114: the restaurant
24289: the people
24456: the second
24597: the current
24871: The Style
24929: the front
25047: the curtain
25132: the movie
25159: The hospital
25249: the night
25881: the way
25892: the rear
25927: the crowd
26194: the podium
26262: the front
26521: the door
26593: the front
26622: The economist
27128: the thing
27228: The next
27290: the Pirate
27409: the material
27461: the crowd
27621: the next
27916: The technician
28084: the way
28487: the technician
28735: the exciting
35709: The Next
36587: The Pinocchio
45436: the Kingdom
45679: The Truth
51623: the same
52526: The Word

How to get anti-aliased fonts for Cygwin with urxvt

urxvt, or rxvt-unicode, is a better alternative to rxvt and xterm that supports xft (read anti-aliased) fonts. Here's how to make your terminal pretty:

You need: Cygwin with X, urxvt, and fontconfig (all available through Cygwin's setup utility)
  1. To see the list of available fonts run: $ fc-list
  2. Select a font and put it in your ~/.Xdefaults file. e.g.
    URxvt*font: xft:Bitstream Vera Sans Mono:size=12
    Urxvt*boldFont: xft:Bitstream Vera Sans Mono:size=12:style=Bold
  3. Run: $ urxvt
For reference, here is the list of fonts I got:
Bitstream Charter:style=Bold
Bitstream Charter:style=Bold Italic
Bitstream Charter:style=Italic
Bitstream Charter:style=Regular
Bitstream Vera Sans Mono:style=Bold
Bitstream Vera Sans Mono:style=Bold Oblique
Bitstream Vera Sans Mono:style=Oblique
Bitstream Vera Sans Mono:style=Roman
Bitstream Vera Sans:style=Bold
Bitstream Vera Sans:style=Bold Oblique
Bitstream Vera Sans:style=Oblique
Bitstream Vera Sans:style=Roman
Bitstream Vera Serif:style=Bold
Bitstream Vera Serif:style=Roman
Charter:style=Bold
Charter:style=Bold Italic
Charter:style=Italic
Charter:style=Regular
Clean:style=Regular
ClearlyU Alternate Glyphs:style=Regular
ClearlyU PUA:style=Regular
ClearlyU:style=Regular
Courier 10 Pitch:style=Bold
Courier 10 Pitch:style=Bold Italic
Courier 10 Pitch:style=Italic
Courier 10 Pitch:style=Regular
Courier:style=Bold
Courier:style=Bold Italic
Courier:style=Bold Oblique
Courier:style=Italic
Courier:style=Oblique
Courier:style=Regular
Cursor:style=Regular
Fixed:style=Bold
Fixed:style=Bold SemiCondensed
Fixed:style=ja
Fixed:style=ko
Fixed:style=Oblique
Fixed:style=Oblique SemiCondensed
Fixed:style=Regular
Fixed:style=SemiCondensed
Helvetica:style=Bold
Helvetica:style=Bold Oblique
Helvetica:style=Oblique
Helvetica:style=Regular
Lucida:style=Sans
Lucida:style=Sans Bold
Lucida:style=Sans Bold Italic
Lucida:style=Sans Italic
LucidaBright:style=Italic
LucidaBright:style=Regular
LucidaTypewriter:style=Sans
LucidaTypewriter:style=Sans Bold
Luxi Mono:style=Bold
Luxi Mono:style=Bold Oblique
Luxi Mono:style=Oblique
Luxi Mono:style=Regular
Luxi Sans:style=Bold
Luxi Sans:style=Bold Oblique
Luxi Sans:style=Oblique
Luxi Sans:style=Regular
Luxi Serif:style=Bold
Luxi Serif:style=Bold Oblique
Luxi Serif:style=Oblique
Luxi Serif:style=Regular
New Century Schoolbook:style=Bold
New Century Schoolbook:style=Bold Italic
New Century Schoolbook:style=Italic
New Century Schoolbook:style=Regular
Newspaper:style=Regular
Terminal:style=Bold
Terminal:style=Regular
Times:style=Bold
Times:style=Bold Italic
Times:style=Italic
Times:style=Regular
Utopia:style=Bold
Utopia:style=Bold Italic
Utopia:style=Italic
Utopia:style=Regular

Python word wrap function

Update 2008-09-18: I just found out there is a textwrap module in the Python Standard Library. See the docs at: http://docs.python.org/lib/module-textwrap.html.

I'm working on creating function headers for our C development code. These headers include the function name, a purpose statement, input/output lists, etc. So my solution (because I'm lazy and prefer scripting to writing hundreds of lines of not-actually-code) is to write a Python script to write the headers. I put all the pertinent information (function names, variable names, descriptions, etc.) in an Excel spreadsheet and I'm using Python to read the data and properly format it. (See here and here for more info on using Python w/ Excel.) Things are going pretty well. The spreadsheet (and the script) are getting a little messy, but overall, it is faster (I think), more fun (definitely) and I believe will produce more consistent results. It also allows me to be more flexible if names or descriptions change in the future because I only need to change the information once in the spreadsheet instead of mutiple places in the actual .c files.

One of the rules for the function headers is that they must be 80 columns or less in width. It is annoying to wrap everything by hand so I wrote a Python function to do the wrapping. (I know Emacs could probably do all this in about 2 lines of Lisp, but I haven't learned that much yet.) Here is the script with a couple of examples:

def word_wrap(string, width=80, ind1=0, ind2=0, prefix=''):
    """ word wrapping function.
        string: the string to wrap
        width: the column number to wrap at
        prefix: prefix each line with this string (goes before any indentation)
        ind1: number of characters to indent the first line
        ind2: number of characters to indent the rest of the lines
    """
    string = prefix + ind1 * " " + string
    newstring = ""
    while len(string) > width:
        # find position of nearest whitespace char to the left of "width"
        marker = width - 1
        while not string[marker].isspace():
            marker = marker - 1

        # remove line from original string and add it to the new string
        newline = string[0:marker] + "\n"
        newstring = newstring + newline
        string = prefix + ind2 * " " + string[marker + 1:]

    return newstring + string
Example 1: wrap at 60 characters
string = "PURPOSE: To end world hunger, create peace for all people, solve all technological and scientific problems, make an exorbitant amount of money, and remain humble in the process."
print word_wrap(string, 60)
Results:
PURPOSE: To end world hunger, create peace for all people,
solve all technological and scientific problems, make an
exorbitant amount of money, and remain humble in the
process.
Example 2: wrap at 60 chars, with a prefix, and a hanging indent
print word_wrap(string, 60, 0, 9, " * ")
Results:
 * PURPOSE: To end world hunger, create peace for all
 *          people, solve all technological and scientific
 *          problems, make an exorbitant amount of money,
 *          and remain humble in the process.

Working with columns in Emacs

In Eclipse, I got a plugin called Columns for Eclipse to cut or paste a column of text. (See this previous post.) In Emacs, this functionality is built-in and columns are called rectangles. Here is how to insert a column of text in Emacs.

I had a list of function names and wanted to turn them into function prototypes by adding "static void " at the beginning and "(void);" at the end.
DoSomethingIntelligent
CalculateSomethingComplicated
DoHardWork
MakeOurCompetitorsBegForMercy
GiveNoMercyToCompetitors
BecomeAwareOfReality
DoSomethingBoring
WonderAboutTheMeaningOfLife
WishIWerePythonOrLisp
To do this, I put the cursor at the beginning of the first function name, pressed CTRL+SPACE to "set the mark" (see section 12 of the manual for more information about the mark), and moved the cursor to the beginning of the last function name. Then do M-x string-insert-rectangle <RET> static void <RET> and got:
static void DoSomethingIntelligent
static void CalculateSomethingComplicated
static void DoHardWork
static void MakeOurCompetitorsBegForMercy
static void GiveNoMercyToCompetitors
static void BecomeAwareOfReality
static void DoSomethingBoring
static void WonderAboutTheMeaningOfLife
static void WishIWerePythonOrLisp
I just realized now that I cannot add the "(void);" to the end with string-insert-rectangle because I do not want to insert the "(void);"s as a rectangle. If I did, it would look like this:
static void DoSomethingIntelligent         (void);
static void CalculateSomethingComplicated  (void);
static void DoHardWork                     (void);
static void MakeOurCompetitorsBegForMercy  (void);
static void GiveNoMercyToCompetitors       (void);
static void BecomeAwareOfReality           (void);
static void DoSomethingBoring              (void);
static void WonderAboutTheMeaningOfLife    (void);
static void WishIWerePythonOrLisp          (void);
But that is ugly and I don't like that. So I guess I'll have to learn how to write a Lisp macro to do this. To be continued...

Note, If you want to delete the "static" from all the prototypes, you can select the text in the same way and do M-x delete-rectangle. Or you could use C-x r d if you haven't rebound C-x like I have.

See also Section 16 Rectangles for more information.